Facebook Group List for Posting: How to Build One That Really Works
A ready-made list that everyone copies is the same list everyone posts in. Here’s how to build your own list - and how to spot a dead group before you waste your time.
If you searched for “Facebook group list for posting” you probably found a few articles with a hundred group names. The problem with these lists isn’t that they’re useless - it’s that they go out of date. Groups close, admins change the rules, and a group that was active two years ago is now a dead noticeboard. Plus, a list everyone copies is the same list everyone posts in.
What does work: build your own list, tailored to your field and area, and keep it up to date. It takes an hour the first time, and after that it’s an asset.
Four types of groups worth having on your list
- Local groups - “Residents of”, “What’s happening in”, “Recommendations in”. Most relevant for businesses serving a specific area.
- Topic groups - Where your customers talk about the problem you solve, even if you’re not mentioned.
- Professional groups - Industry peers. Fewer direct clients, more collaborations and referrals.
- Buy-sell groups - “Second hand in”, “Business recommendations”. Good for products, less for services.
How to build your list in an hour
Shortcut: You can let our free group finder handle this step - enter a field and city and get a list of groups with member counts, ready as an Excel file. The manual methods below are still worth your time, especially the second one.
Three methods, in this order:
1. Search in the customer’s words
In Facebook’s search bar, filter to “Groups” and search using the terms your customers use - not your professional jargon. “Apartments for rent in Columbus” instead of “residential real estate”. “Who knows a plumber” instead of “plumbing services”.
2. Through your existing customers
Go to the profiles of a few happy customers. The public groups they’re in are exactly where more people like them hang out. This is the most accurate method and most people skip it.
3. Through a competitor’s successful post
Found a competitor’s post with lots of comments? Check which groups it was posted in. These are proven groups.
After you join - Facebook will start suggesting similar groups on its own. That’s the snowball effect.
How to filter: the two-minute test
Before adding a group to your list, scroll back two weeks and check:
- How many posts a day? Fewer than two - no audience. More than fifty - you disappear in minutes.
- Are there replies? A group where posts get zero replies is a noticeboard, not a community.
- Is there conversation or just ads? If every post is selling, no one reads.
- What are the rules? Read them. A group that bans business posts doesn’t belong on your list, and a group with a set posting day should be tagged.
How to Join Without Looking Suspicious
Joining is the easiest step to get wrong, and most people don’t know it’s even checked. Joining fifty groups in one day is unusual by itself, and can get you limited before you post anything.
- Spread over two weeks. Five to ten groups a day is a reasonable pace. There’s no official number, but a sudden spike in activity gets flagged.
- Answer the screening questions seriously. Many groups ask questions when you join. Blank or generic answers get rejected, and repeated rejections are a sign themselves.
- Complete your profile before joining. Admins check. A profile with no photo and no history gets rejected more often.
- Wait a few days before your first post. Read the group, get a feel for the tone, comment on someone else’s post. Posting on your join day marks you right away.
How to organize your list
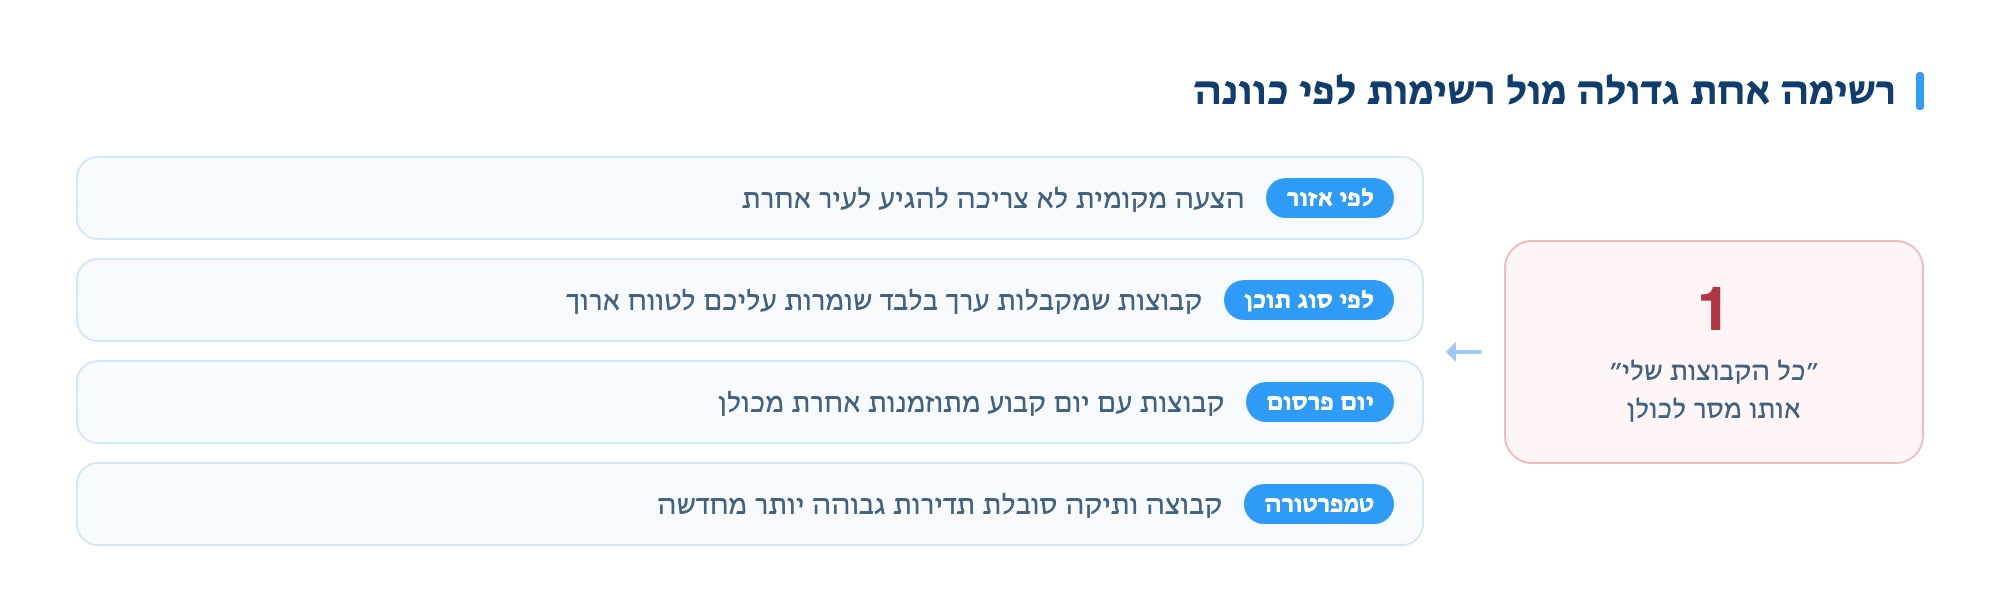
One long list isn’t useful, because not every post fits every group. Split into lists by your posting logic - by area, by product type, or by group type. That way, a post about a property in the north only goes to the north list, and a holiday offer goes to all.
In Postly, your lists are saved in the tool itself, so you build them once and pick a list for each post instead of selecting groups every time. More details: Software for posting in Facebook groups.
The split that works is by what you’ll post, not how you signed up:
- By area. If your service is local, an offer for one city shouldn’t go to groups for another.
- By content type. One list for professional posts, one for offers. Groups that get value from you and not just ads keep you around longer.
- By group rules. Groups with a set posting day deserve a separate list, since their timing is different.
- By temperature. Groups that already know you can handle more frequent posts than ones you just joined.
Maintenance: ten minutes per quarter
Once a quarter, review your list and remove groups that are no longer active, groups that deleted your post twice, and groups you joined but never got a single lead from. A list of twenty active groups is better than a hundred mostly dead ones.
These are the signs a group is no longer worth its spot:
| Sign | What it means | What you’ll do |
|---|---|---|
| Posts go through but there are no comments | The group is inactive or flooded | Remove. Reach without engagement is worthless |
| Posts haven’t been approved for a month | Change in rules or admin | Check the rules once, and if they haven’t changed, remove |
| No leads came from there | The audience isn’t your audience | Remove after two months of tracking |
| Most posts in the group are ads | Bulletin board, low conversion | Keep in a separate list and post less often |
This check takes fifteen minutes per quarter, and has the biggest impact on results. A list of twenty checked groups performs better than a hundred collected once and never reviewed.